

Audio model:
Groups throughout varied industries use a undertaking timeline to remain on observe and visualize key work processes. It may be created not solely with the assistance of highly effective planning instruments however even with publicly out there platforms similar to PowerPoint.
Find out how to create a undertaking timeline in PowerPoint? Are there alternative ways to do it and what steps are important for fulfillment?
This text supplies detailed solutions and another strategy for producing a visually spectacular timeline utilizing a sturdy Gantt chart maker.
On the finish of the article, you’ll additionally discover a video overview.
Contents:
Find out how to create a undertaking timeline in PowerPoint
When you assume that PowerPoint is now not related for contemporary managers and groups, some research can change your thoughts.
One in all them is the analysis exhibiting that this common Microsoft software continues to be a necessary useful resource for folks creating displays.
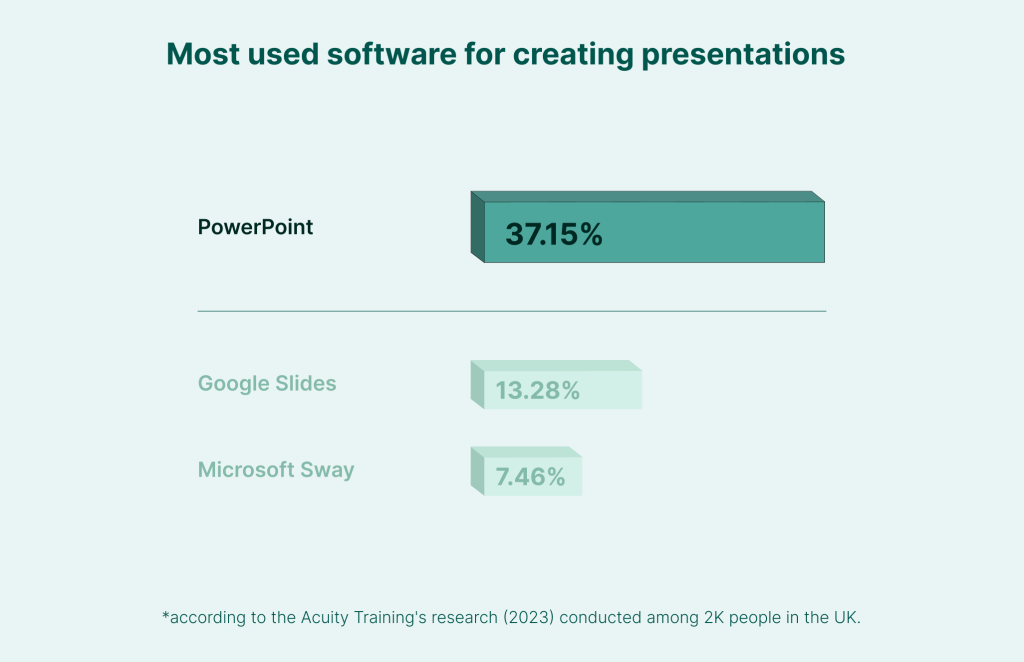
Getting ready displays is the core performance of this software. Nonetheless, it is usually extensively used for producing timelines.
Find out how to create a undertaking timeline right here?
The customers of Microsoft PowerPoint normally spotlight 2 primary methods of utilizing this software program to make undertaking timelines:
- With the assistance of a easy desk.
- With the assistance of the SmartArt function.
Let’s dive into these approaches and discover every step, accompanied by related visuals.
However earlier than we begin, be sure you have gathered all the data required on your future undertaking timeline.
Possibility 1: tips on how to create a undertaking timeline in PowerPoint utilizing a easy desk
PowerPoint supplies built-in instruments, like a primary desk, that can be utilized to create easy timelines.
Nonetheless, it requires time and persistence because you’ll must rigorously comply with every step in sequence with out overlooking any particulars.
Right here’s how one can implement this time-consuming but efficient strategy.
By the best way, you could discover these steps acquainted if you happen to’ve ever explored tips on how to make a Gantt chart in PowerPoint.
1. Open a PowerPoint slide and insert a desk
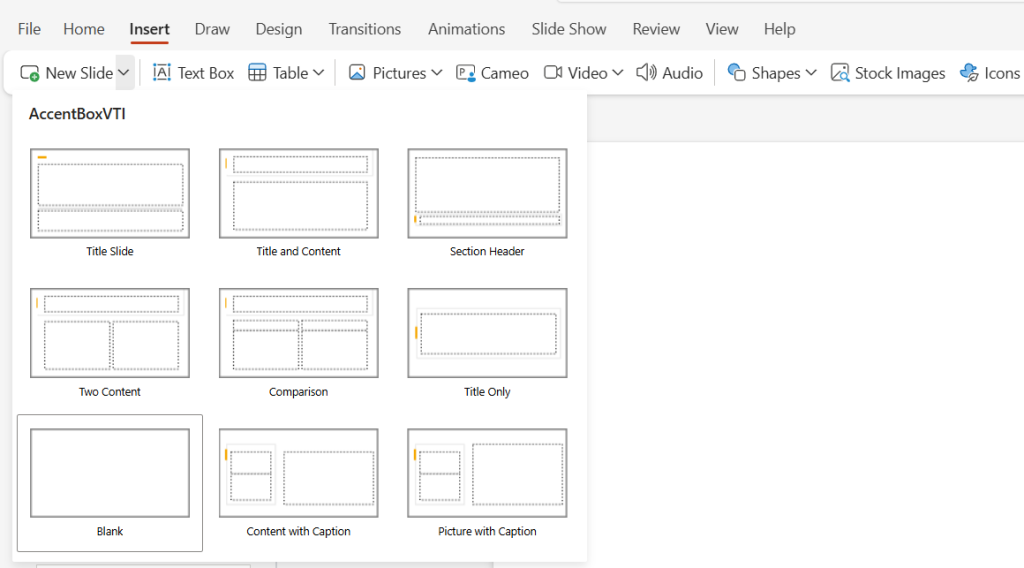
Open PowerPoint and go to the Insert tab on the ribbon on the high of your display screen. Click on on it.
You’ll see a tab titled New Slide in your left.

Click on on it to get completely different layouts for a presentation.
For our instance, we’ll use a Clean presentation.
Now you may see an empty clean that may be full of the required information.
Then go to the Insert tab once more and discover Desk. Right here you need to choose the variety of cells and rows on your future desk.
When you choose them, click on Enter.
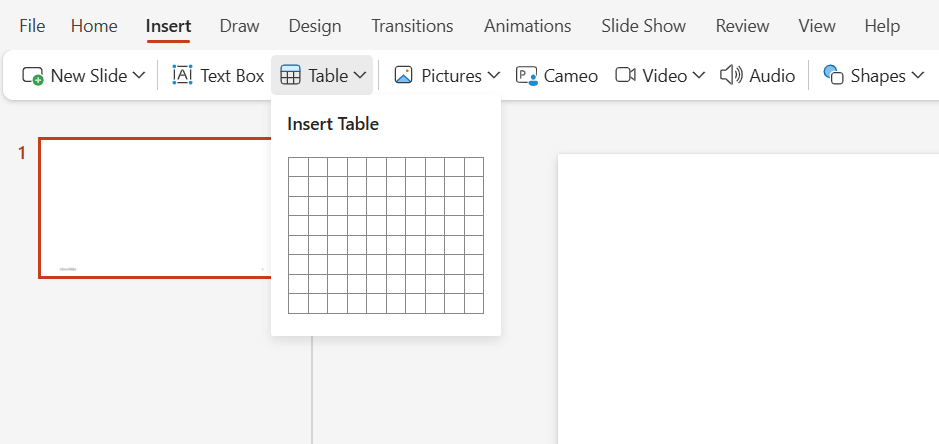
In our instance, we add 1 row and 17 columns.
If you’ll want to add some extra cells or rows, choose the required quantity (for instance, 6 cells) and go to the Insert tab once more. Click on it and also you’ll get further choices for including.

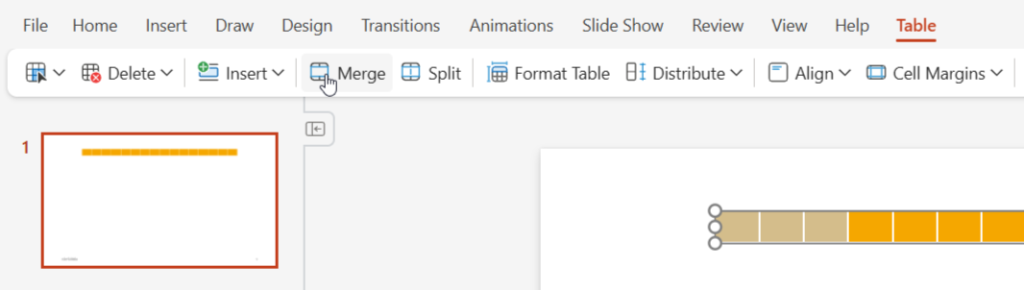
Right here we determine to merge 3 first cells to make a column for duties. 14 cells will likely be used for months later.
Choose the required variety of cells by clicking on them and dragging them to the facet. Then go to the Desk tab on the menu ribbon. Click on on Merge.
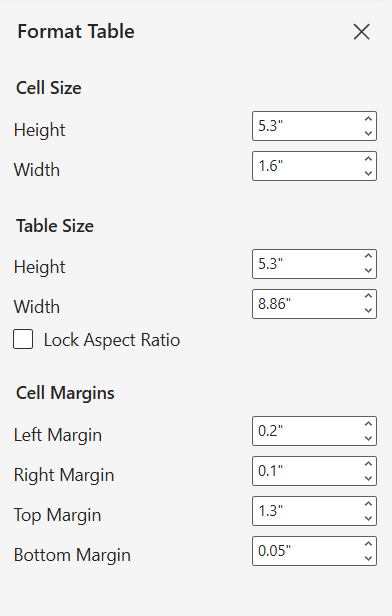
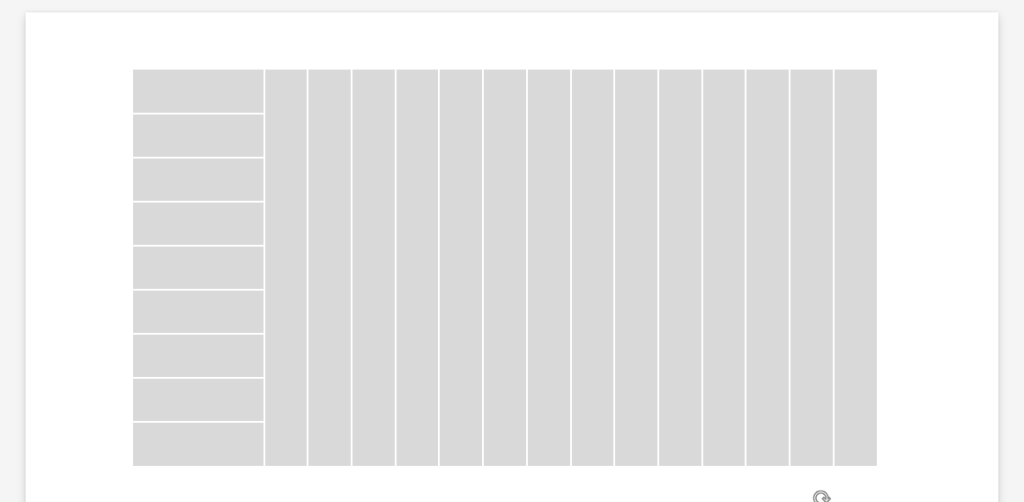
Now you may improve the peak of the long run columns to allow them to fill the complete clean. It may be finished manually by reaching for the sting of the desk and utilizing drag-and-drop or by clicking on Format Desk (this tab is situated beneath the primary menu ribbon in the identical line as Merge).
By clicking on Format Desk, you’ll get the choice for formatting the width and size of your desk on the proper facet of your display screen.
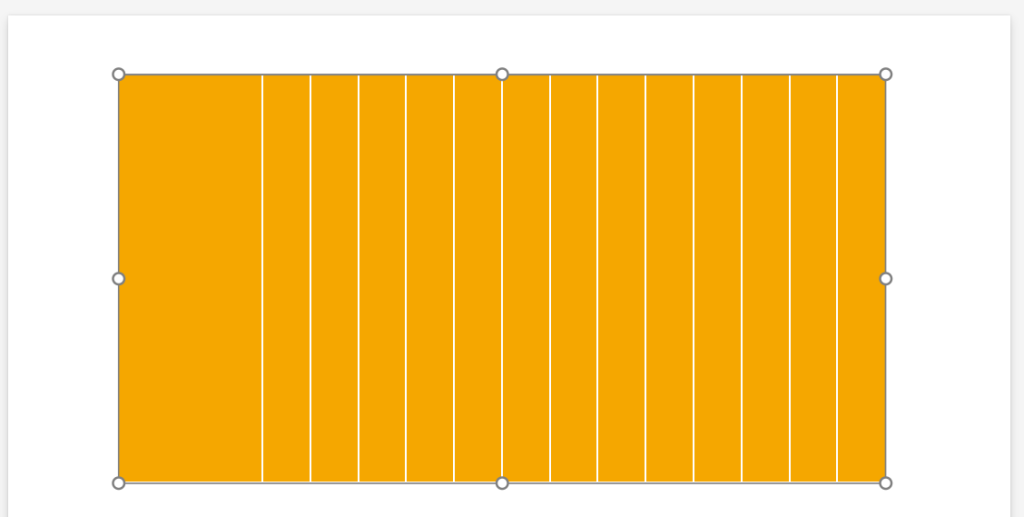
Right here’s what you will get after this step.
2. Modify the visible parameters of your desk
Now when you’ve the desk, let’s work with its visible enchantment.
You may change its coloration and choose up the kind of border visualization.
To do it, go to the proper facet of the pane within the Desk tab.
There you’re going to get choices to make visible adjustments to your desk.
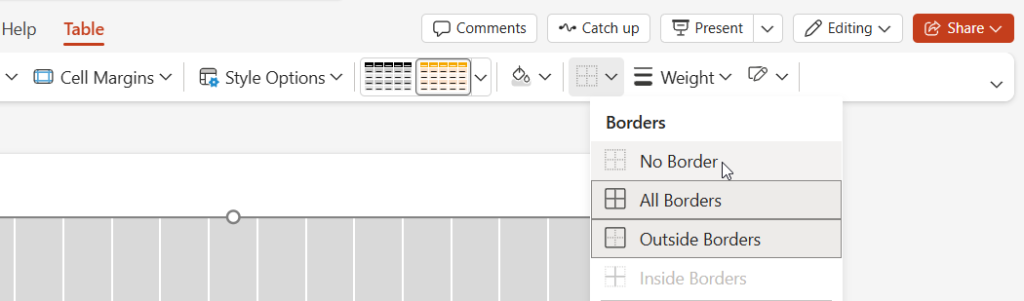
In our instance, we select gray coloration and white borders for a future undertaking timeline.
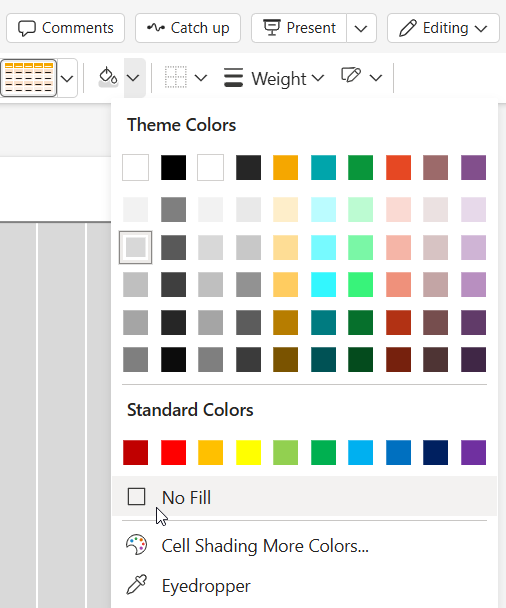
Alternatively, you may choose the Shading choice and select No Fill in order that your desk doesn’t have a background coloration.
3. Modify the technical features of your desk
Now, you may optimize the technical features of your future undertaking timeline.
It’s doable to separate any column into a number of rows.
For that, choose the required column and select Cut up within the Desk tab.
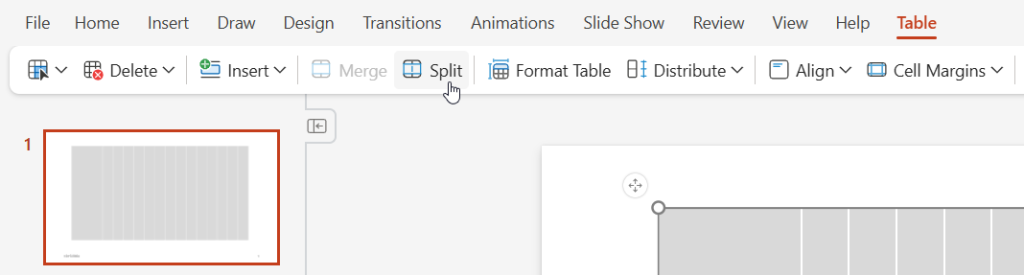
After clicking on Cut up, you will note a window with choices for selecting the variety of columns and rows.
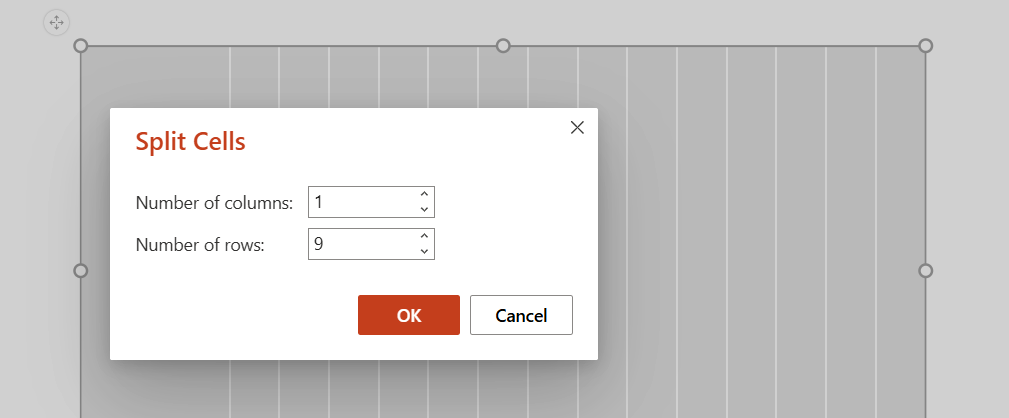
Choose the variety of rows relying on the variety of duties you’ve.
In our instance, we select 9 rows for the primary column.
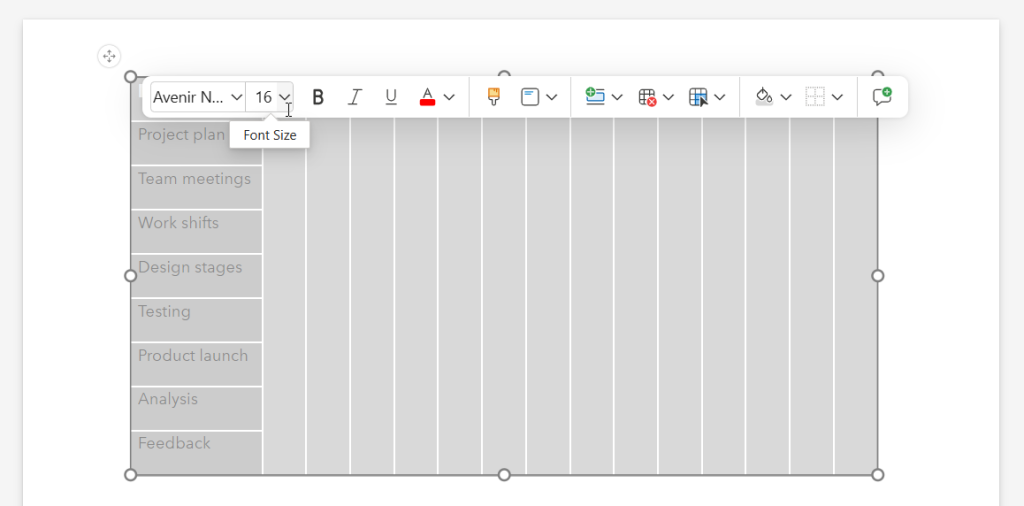
4. Insert your undertaking information
Now you may insert duties into these rows.
In our instance, the primary row will likely be used for a title.
It’s doable to edit textual content coloration, alignment, and different attributes in keeping with your preferences utilizing the built-in enhancing panel that seems if you hover over it.
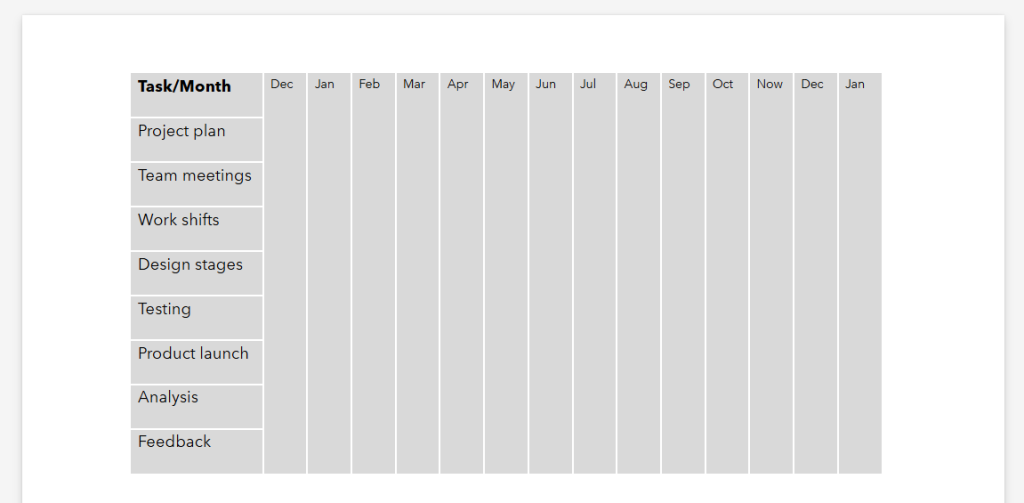
When your rows are stuffed, you may add months.
Merely click on on a selected column and begin typing on the high or backside of it.
In our instance, we use the abbreviation of months positioned on the high of the columns.
Right here’s how the desk appears now.
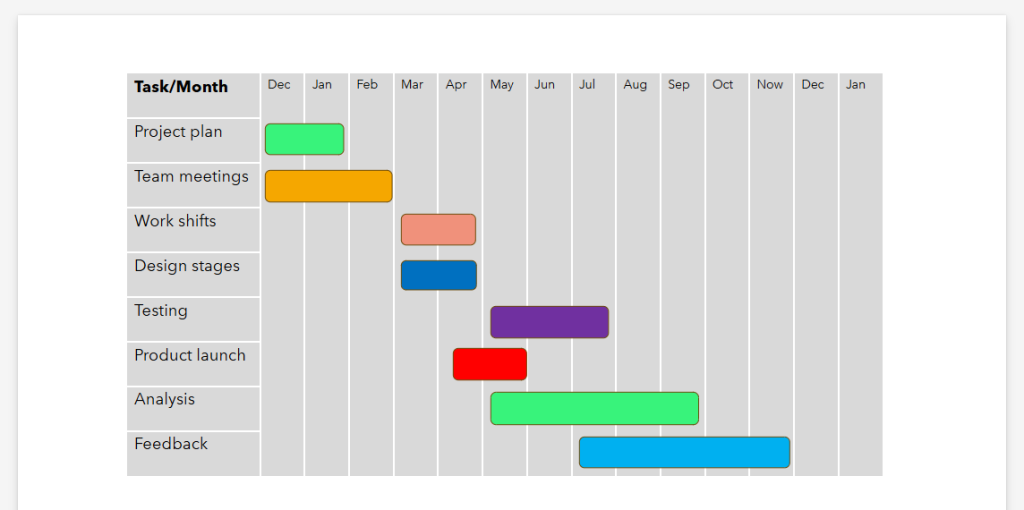
5. Add bars to make a timeline
Now it’s time to start out including process bars.
To do it, go to the Insert tab, discover Shapes, and select Rounded Rectangle within the appeared window.
Click on on it and paste close to a selected process. Then you may merely copy and paste it for every process.

It should help you add rectangles much like typical Gantt chart bars for every process contemplating their period and begin and finish dates.
In our instance, we use months on the timeline, so we don’t want exact date particulars.
In PowerPoint, you may also change colours on your duties to distinguish them. Coloration variants and another stylistic choices will seem if you click on on every rounded rectangle.
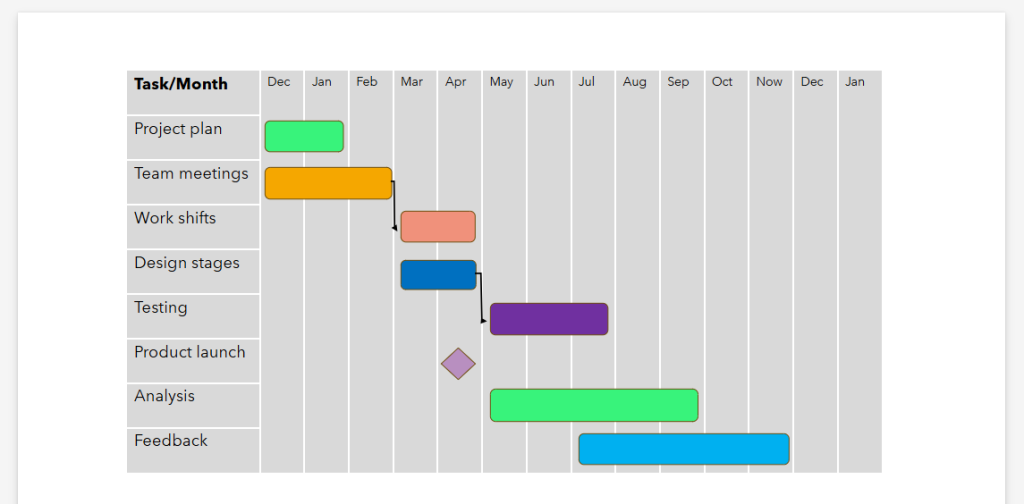
Moreover, you may take the identical steps to visualise doable dependencies between duties.
Go to the Insert tab, choose Shapes, and discover Elbow Arrow Connector to use it for exhibiting wanted connections.
To hyperlink rounded rectangles, click on on the sting of 1 and drag the arrow to the specified fringe of the opposite one.
In the identical means, you may change a process to a milestone utilizing the Diamond form.
Merely delete the rectangle you need to remake and insert this type of form as a substitute. You might choose another variant however the type of diamond is most frequently used to visualise a milestone on timelines.
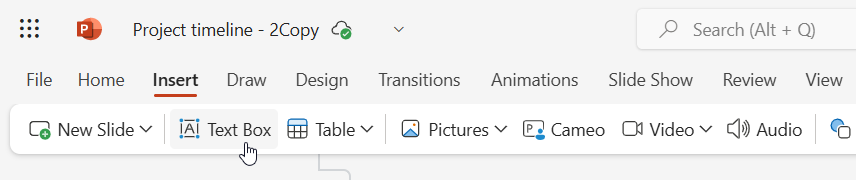
If crucial, you may also add a title to your undertaking timeline.
For that, click on on the timeline location the place you need your title to seem.
Go to the Insert tab and choose the Textual content Field. Click on on it and sort a title. Then press Enter.
That’s it. Your undertaking timeline in PowerPoint made with the assistance of a easy desk is prepared.

How do you discover this methodology?
When you’re in search of an easier course of, you’d higher discover tips on how to make a undertaking timeline in PowerPoint with the assistance of the SmartArt function.
Possibility 2: tips on how to create a undertaking timeline in PowerPoint utilizing SmartArt
Making a PowerPoint timeline might be faster with the assistance of SmartArt.
This built-in Microsoft function streamlines the method, enabling you to design a easy and visually interesting timeline with out requiring superior graphic design abilities.
SmartArt provides a variety of pre-designed layouts, together with organizational charts, flowcharts, and timelines. They are often simply personalized to fit your particular wants.
Beneath are the precise steps that can help if you happen to marvel tips on how to present a undertaking timeline in PowerPoint with SmartArt:
1. Create a clean
Begin a brand new presentation and add a clean.
To do it, go to the Insert tab on the ribbon on the high of your display screen and discover the New Slide part. Click on on it and choose Clean from the drop-down menu.
The empty slide you get will aid you to create a undertaking timeline.

2. Add the Primary Timeline
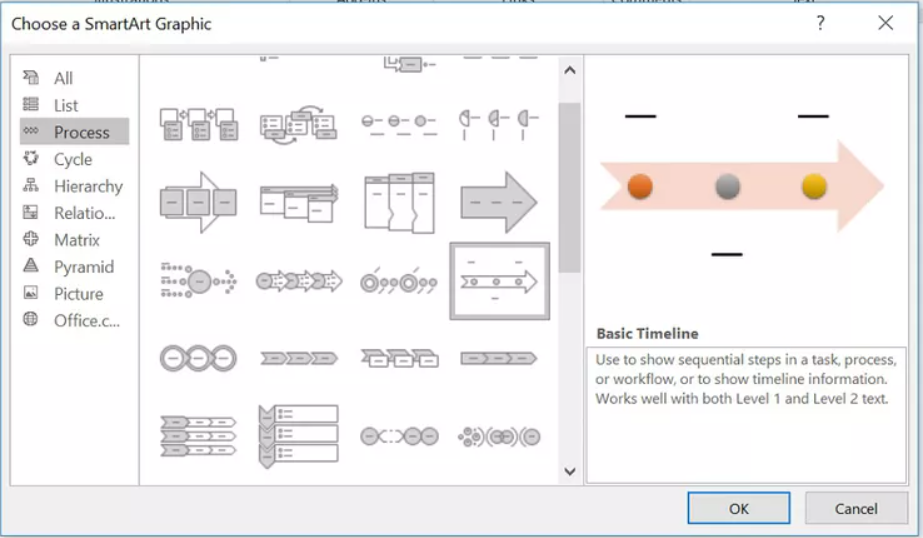
Go to the Insert tab once more. Discover SmartArt there and click on on it.

When the pop-up window seems, go to the Course of class the place you’ll discover a vary of graphic choices on your timeline.
When you want a easy graphic that can clearly exhibit your key undertaking duties, dates, or occasions, choose up the Primary Timeline and click on OK.
If you wish to check out different timeline layouts, be at liberty to decide on completely different choices from the gathering and paste them into your slide.
3. Add your information
At this stage, your default timeline will appear to be the picture beneath.
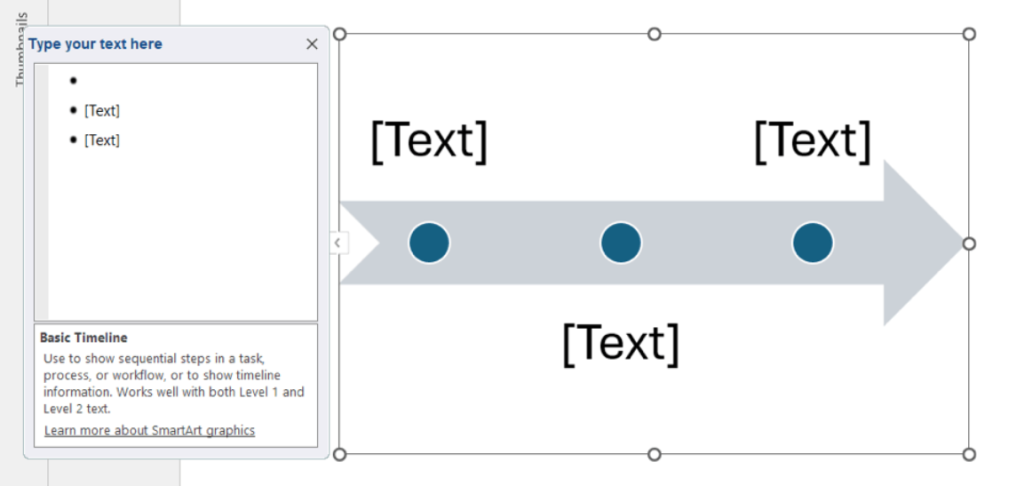
By default, it has 3 factors and locations to enter textual content.
Insert information proper on the graphic by typing it contained in the [Text] bins or use the textual content pane as a substitute — you could find it on the left facet. If this pane isn’t seen, click on on the small icon on the left of your timeline arrow to open it.
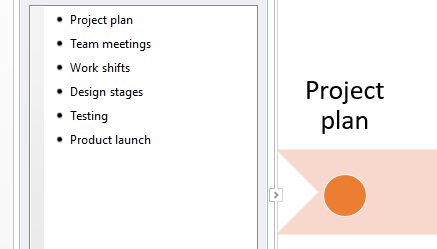
Right here you may simply add further factors to your timeline.
So as to add a brand new one, press Enter after an present merchandise within the pane and sort your information.
In PowerPoint, factors on a timeline are spaced evenly, whatever the precise time intervals between their dates.
Whilst you can manually alter the spacing by dragging factors nearer collectively or farther aside, doing so might distort the format, particularly as extra gadgets are added. It’s higher to stay with the default spacing to keep up a clear {and professional} look.
Moreover, PowerPoint mechanically reduces the font dimension as you add extra occasions to make sure all the things suits throughout the timeline. Nonetheless, this will affect readability, so it’s essential to stability the variety of factors with the readability of your presentation.
4. Format your timeline and add extra particulars
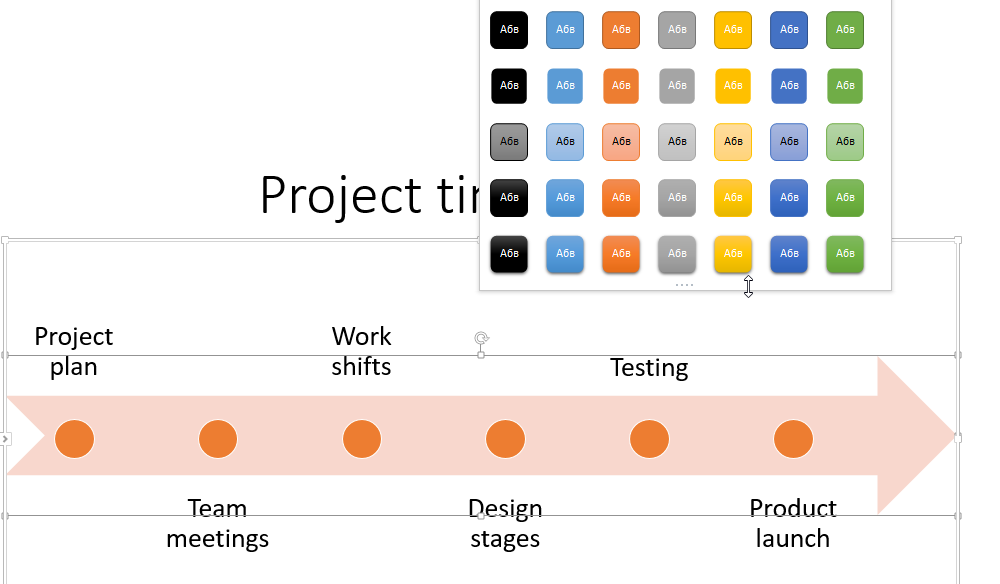
Now, you may format and customise your PowerPoint timeline to make it stand out with distinctive styling choices.
To boost its look, use the SmartArt design tab on the ribbon to regulate types and select from varied coloration palettes.
SmartArt not solely helps you to customise a whole timeline but additionally lets you modify particular person components for a really personalised design.
To make these adjustments, merely click on on any merchandise and discover the formatting choices to regulate its look.
For example, you should use the Form Fill software to emphasise key factors, making them extra noticeable, or change the Font Coloration of dates to distinguish them from level descriptions. It could actually make your timeline extra visually participating and spotlight essential particulars.
To additional improve the design, experiment with varied sizes and shapes for factors.
After exploring the out there choices, right here’s how our up to date timeline might seem.
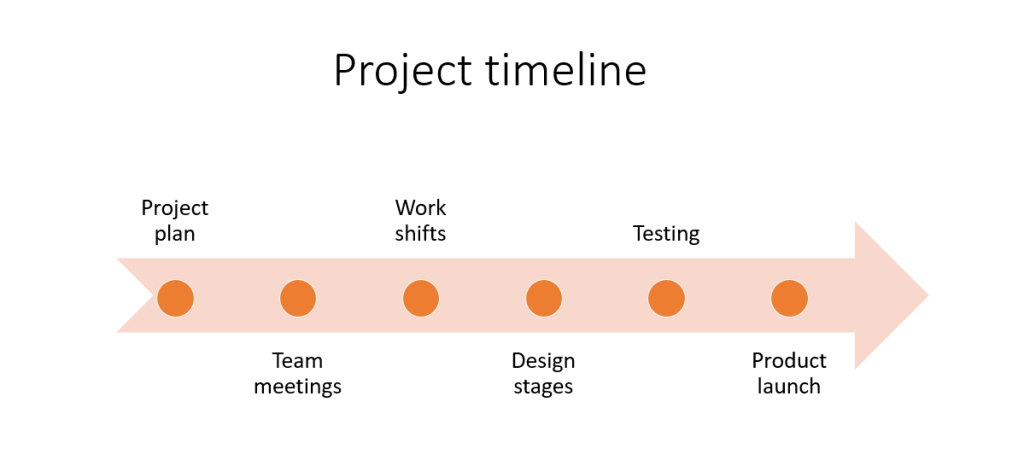
These have been 2 completely different steps for manually making a timeline in PowerPoint.
As you see, each undertaking timeline examples described above aren’t so detailed and fast for creation. Due to this fact, it’s a good suggestion to discover a extra highly effective strategy to making a reliable undertaking timeline.
There’s a option to generate a timeline that’s best suited for skilled undertaking managers and their groups. This methodology is predicated on using a Gantt chart.
To raised discover this strategy, you’ll want a strong on-line software.
One of many main undertaking administration timeline instruments well-known for its accessibility, user-friendliness, and adaptability is GanttPRO.
Find out how to create a undertaking timeline in GanttPRO
GanttPRO is a complete undertaking administration software that allows corporations to streamline planning processes, guiding them from idea to completion.
This Gantt chart software completely fits varied groups concerned in software program improvement, manufacturing, building, retail, healthcare, schooling, and different spheres.
The software program helps all-sized companies visualize tasks of any complexity, schedule duties, allocate sources, handle workflows, set deadlines, and observe progress with ease. A Gantt chart facilitates breaking down tasks into duties, setting dependencies, and marking key milestones.
GanttPRO customers can collaborate with each in-house and distant group members and share timelines with all stakeholders concerned. Superior finances management performance can be included.
What actually distinguishes this platform from PowerPoint and different undertaking timeline makers is its ease of use and velocity in scheduling. It not solely streamlines the timeline creation course of but additionally enriches it with sturdy options that rework a easy timeline into a strong strategic software.
Moreover, many customers admire GanttPRO’s user-friendly interface. One in all them, Maddie B, a sport developer, admits:
GanttPRO’s intuitive design is one in every of its most notable qualities. Regardless that I don’t come from a undertaking administration background, I had no hassle studying tips on how to put it to use. Utilizing the easy drag-and-drop interface, you may shortly and simply create a Gantt chart, timeline, and process dependencies.
Able to see the way it works?
Let’s dive into the steps for creating a shocking undertaking timeline utilizing this versatile Gantt chart maker.
1. Provoke a undertaking
Creating a brand new undertaking in GanttPRO is a fast and hassle-free course of.
To register, use your e-mail or Microsoft, Google, Fb, or LinkedIn account (in case that is your first time in GanttPRO).
When you already know tips on how to use the sturdy Gantt chart creator, then merely log in to your account.
Discover the Create new undertaking button situated within the higher left nook of your web page.
After clicking this button, you may be requested to create a brand new undertaking or a undertaking portfolio. Select the primary choice and enter all the mandatory information within the settings window that can seem.
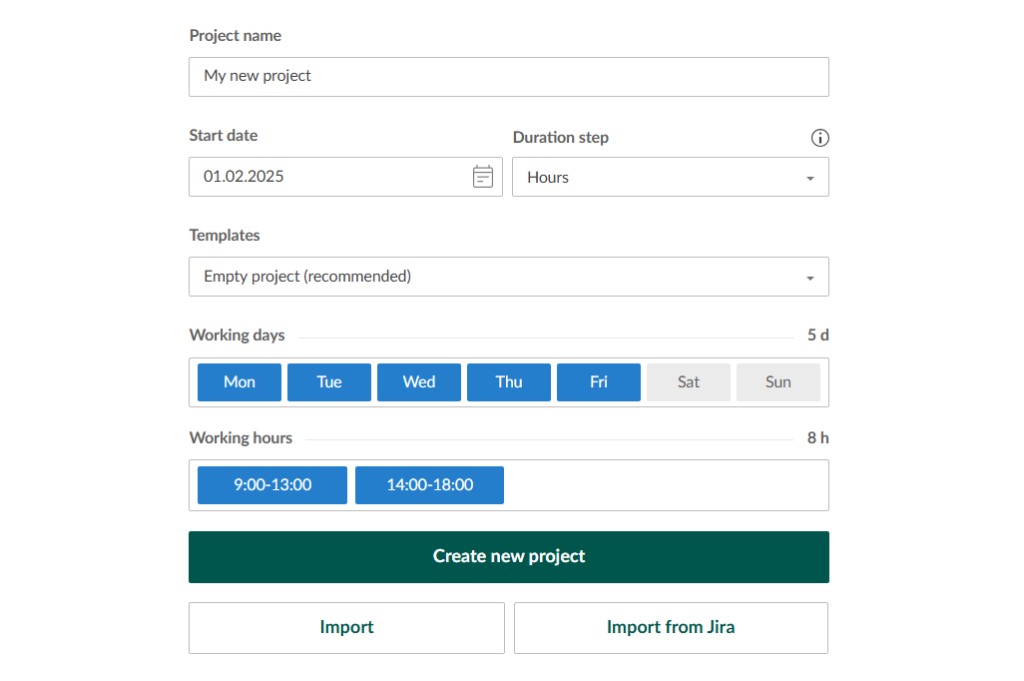
When you want a faster begin, use GanttPRO Gantt chart templates. You’re going to get pre-made timelines designed for software program improvement, schooling, building, manufacturing, retail, and different industries. All of them might be personalized to fit your necessities.
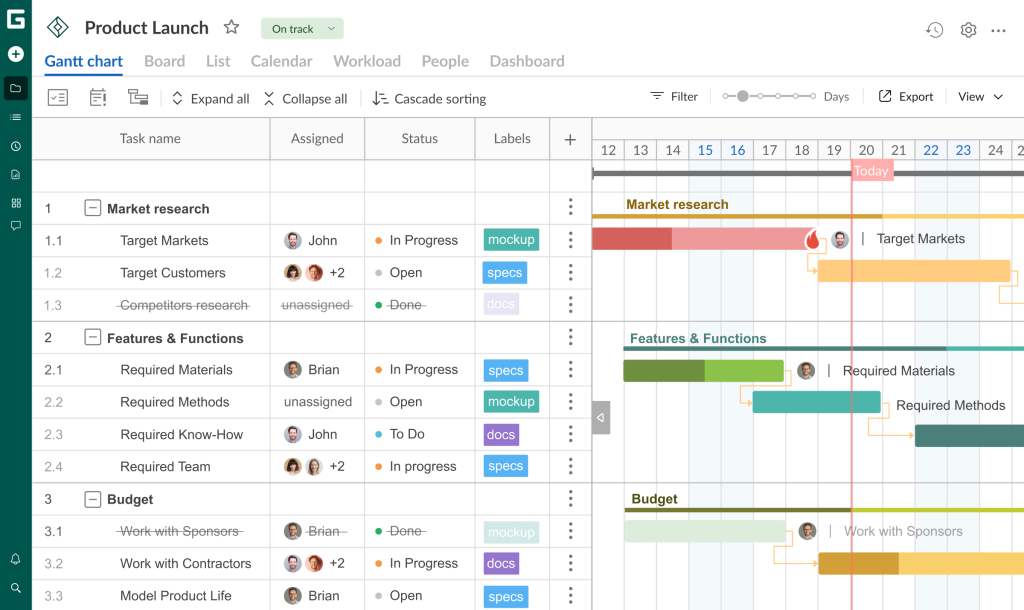
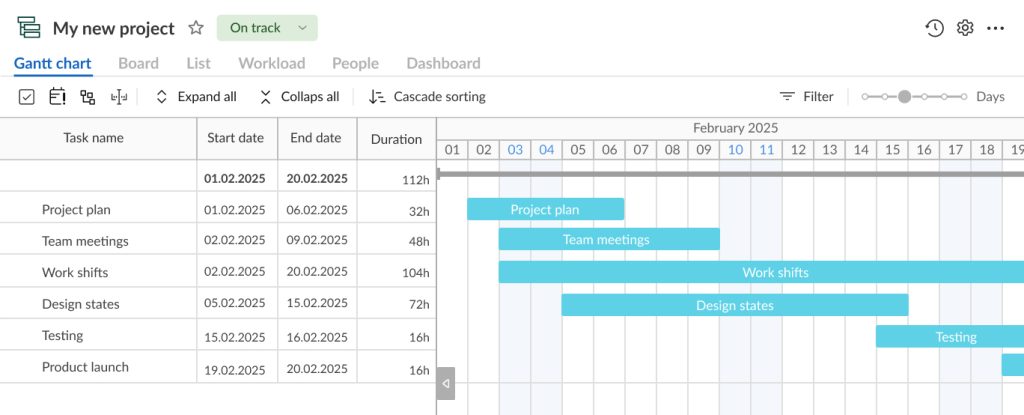
2. Divide your undertaking into manageable duties and subtasks
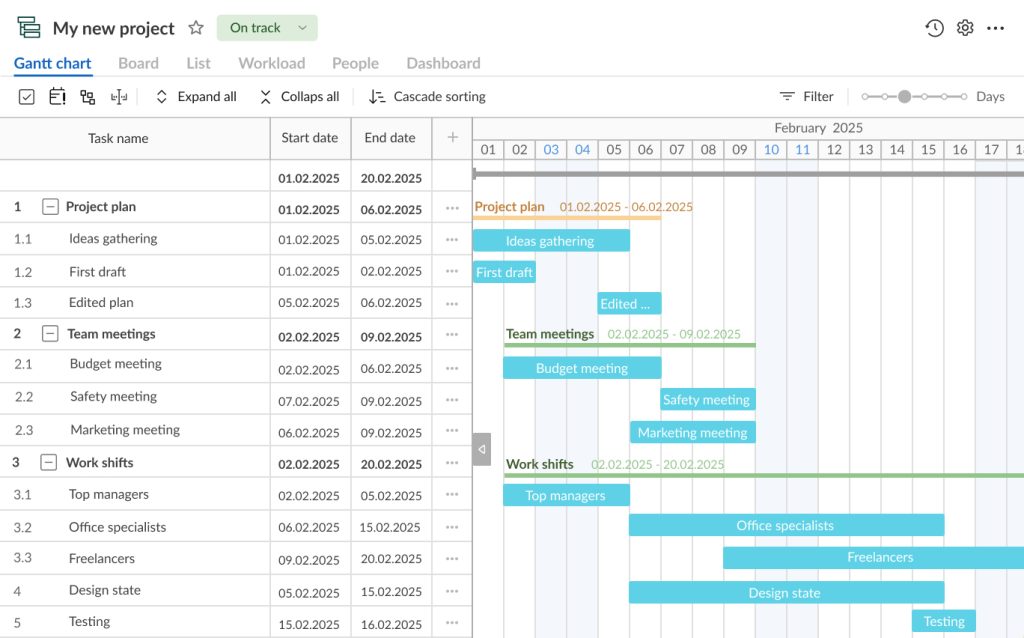
After making a undertaking, you may collect all of your duties and occasions and logically set up them. It’s simple to visualise begin and finish dates and add period for every process.
GanttPRO customers can make the most of a work breakdown construction.
It’s essential to notice right here that this function beneficially distinguishes the Gantt chart maker from PowerPoint and different related instruments.
With this construction, you may divide all practical components of your undertaking into smaller duties and subtasks to maintain issues organized and preserve hierarchy.
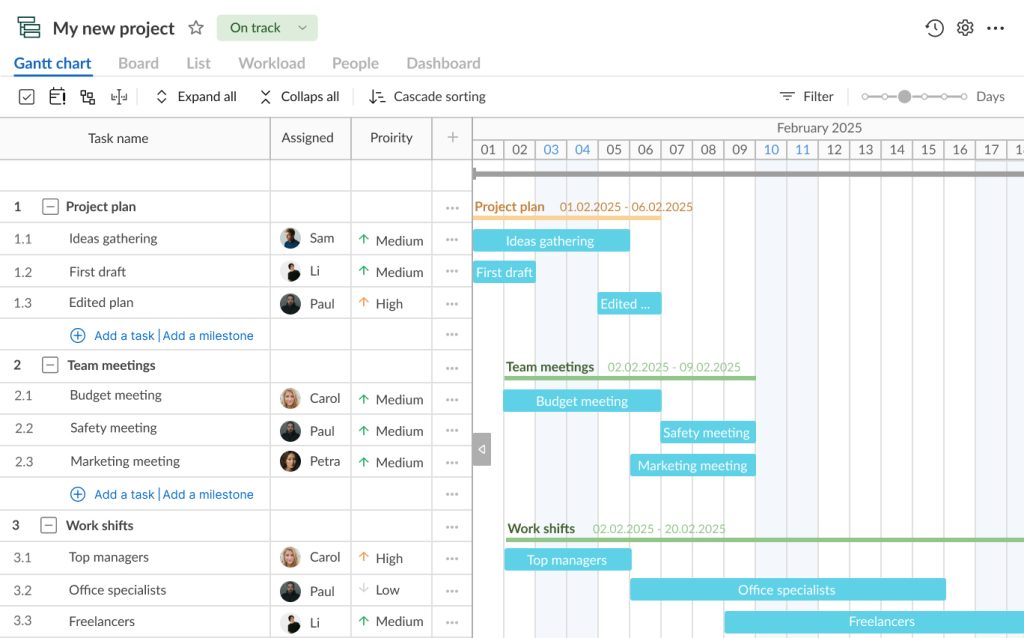
In GanttPRO, you may also replicate the required fields subsequent to every process title. If you’ll want to cover irrelevant fields and substitute them with extra helpful ones, you are able to do it in seconds.
For instance, you may add a creation date, estimation, standing, precedence, assignees, and extra, or create customized fields in keeping with your particular necessities.
3. Contain group members and allocate sources
When your duties and subtasks are logically visualized on a Gantt chart, it’s excessive time to ask accountable group members and set up all work property.
GanttPRO means that you can visualize all of the individuals who have to be concerned in your undertaking and add essential sources to handle and full work processes at any stage of a undertaking lifecycle.
Invite and handle colleagues and digital sources right here, specifying their working time items, prices, and rights.
Efficient Gantt chart software program
Plan and handle tasks simply with an internet Gantt chart.
4. Assign duties and stability workload
Assigning sources to particular duties is one other important step that can assist to make all of your processes run easily.
Your undertaking may have such property as work crews, funds, supplies, particular gear, autos, {hardware}, and extra. All of them might be completely visualized in GantPRO with out confusion and loss.
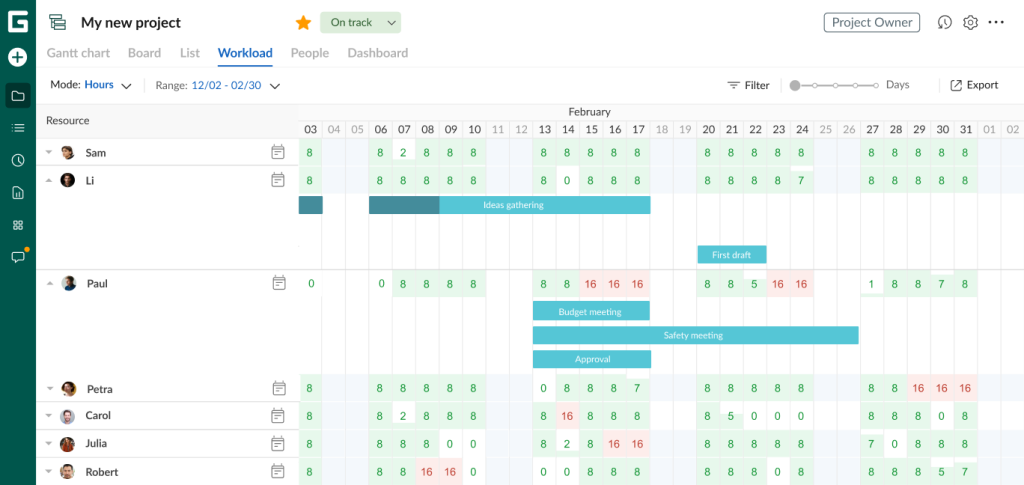
One other good thing about the Gantt chart maker is the workload management function. With its assist, you may see which members of your group are loaded with duties, who’re overloaded, and who, quite the opposite, can get further duties or actions.
A particular purple human icon will seem to exhibit if one in every of your colleagues is overloaded.
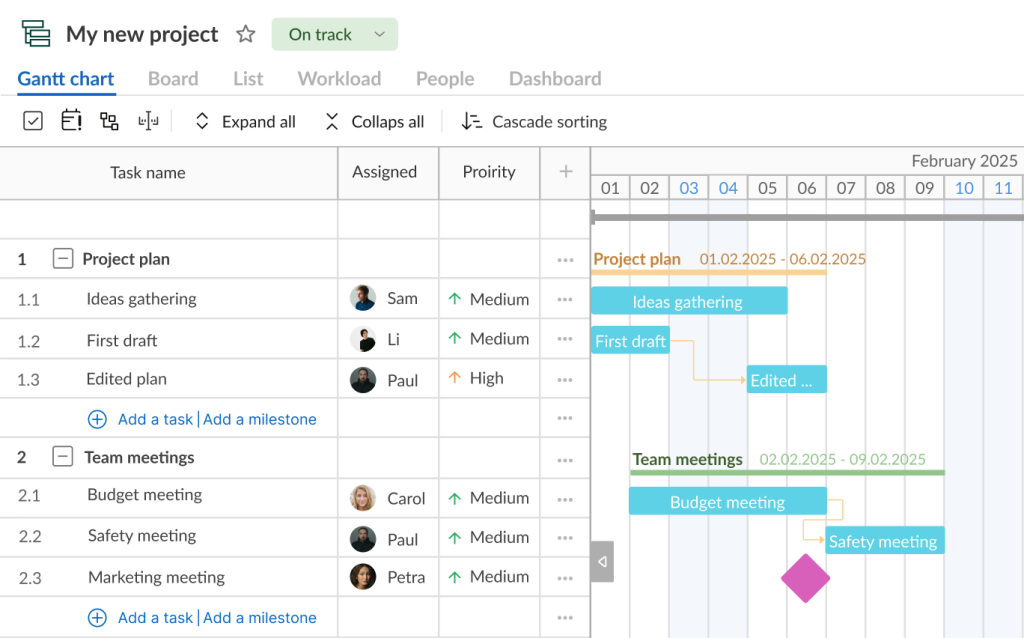
5. Add process dependencies and spotlight milestones
The aptitude so as to add and handle process dependencies is one other vital benefit of utilizing a GanttPRO timeline over PowerPoint.
With a user-friendly drag-and-drop function, you may create clear relationships between duties, guaranteeing a logical workflow and highlighting how adjustments in a single process have an effect on others.
For instance, the completion date of 1 process can function the place to begin for the following one, selling a seamless development of labor.
As well as, GanttPRO permits for highlighting undertaking milestones instantly on a timeline to allow you to deal with key moments or main occasions. With these visible checkpoints, you’ll all the time keep on high of vital undertaking targets and can by no means overlook core achievements.
6. Maintain everybody knowledgeable by sharing your undertaking timeline
Sharing your undertaking timeline with stakeholders is the final however not the least step.
GanttPRO permits for creating a number of hyperlinks to your undertaking and sharing them with anybody you need.
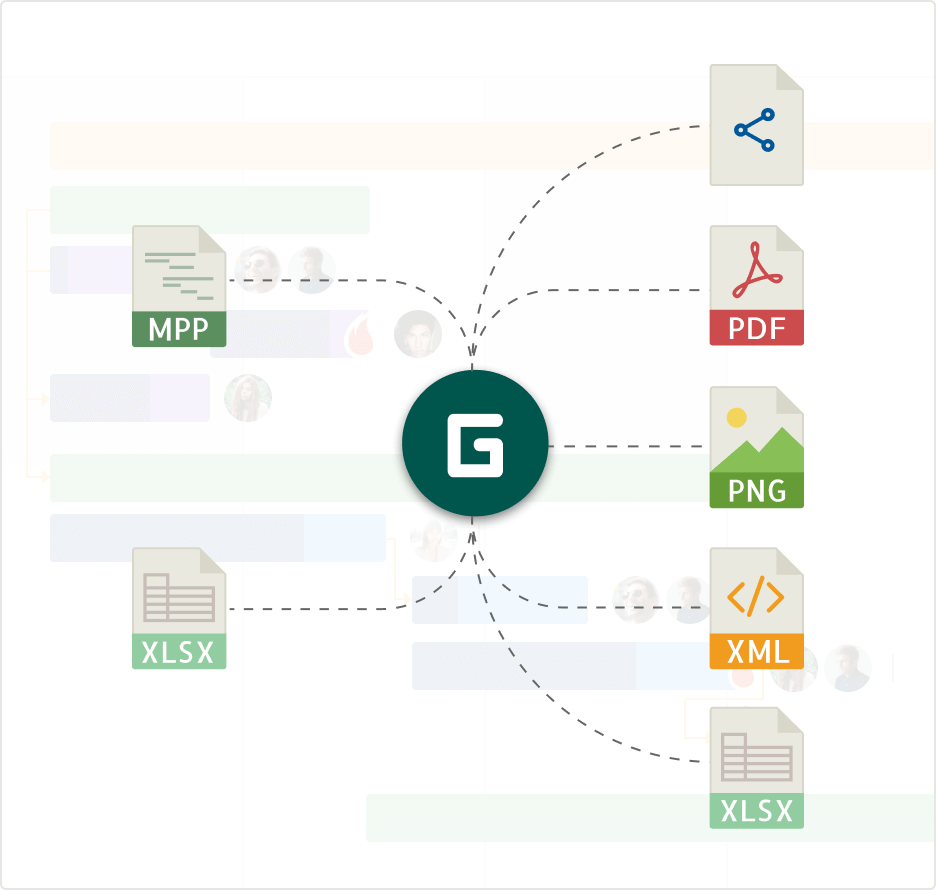
Export important undertaking information with ease in PDF, PNG, XLSX, or XML.
Every of the strategies described above provides a novel but efficient strategy. After exploring them, you need to have a transparent understanding of tips on how to create a undertaking timeline in PowerPoint and in a sturdy Gantt chart answer.
Here’s a video overview.
Create a undertaking timeline in PowerPoint or depend on GanttPRO and get extra streamlined outcomes
PowerPoint is well known for its versatile instruments and streamlined performance, together with choices for creating undertaking timelines. Nonetheless, these choices can generally appear complicated and never intuitive for customers.
In case your undertaking wants a extra detailed and visually clear timeline that showcases duties, dependencies, milestones, period, and sources at a look, GanttPRO is a software price exploring.
Whether or not you select the Microsoft answer or a strong Gantt chart software like GanttPRO, a well-prepared undertaking timeline will function your strategic ally, guaranteeing seamless workflows and improved group productiveness.